Setup a New Calibration
Only the Application Administrator or global admin user can setup a Calibration.
New Calibration Setup options
There are two ways to set up a new calibration in DoseControl:
Enter the configuration data manually
Import a Calibration directly into DoseControl.
Manual Setup
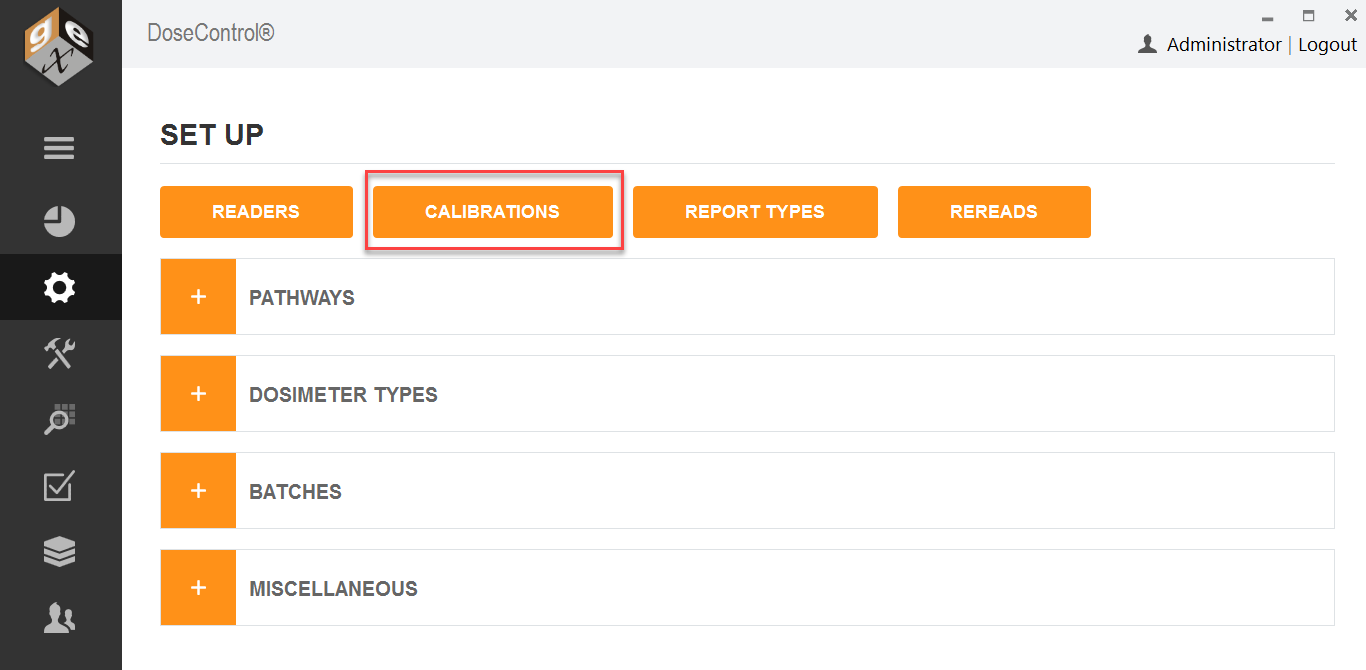
1 On the Set Up screen, click the “Calibrations” button.
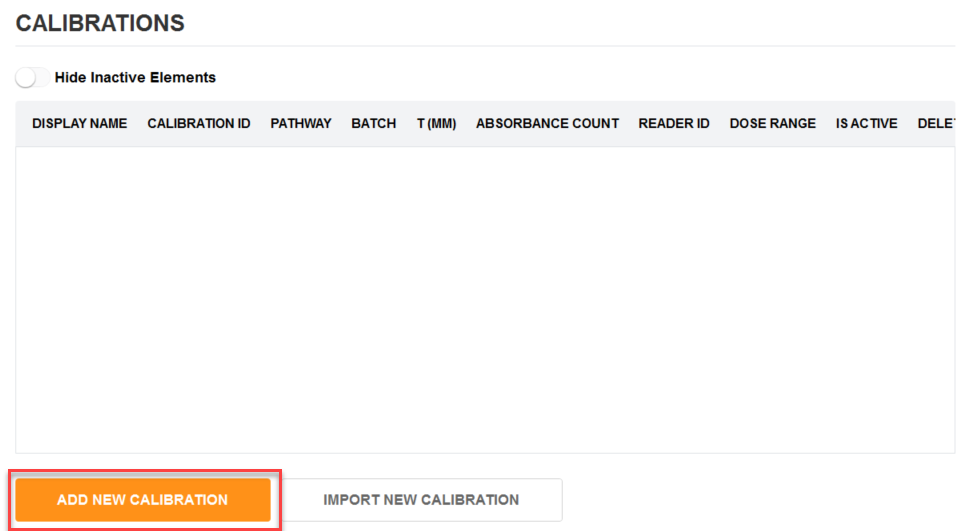
2 On the main Calibration screen, click the “Add New Calibration” Button.
Enter Calibration information
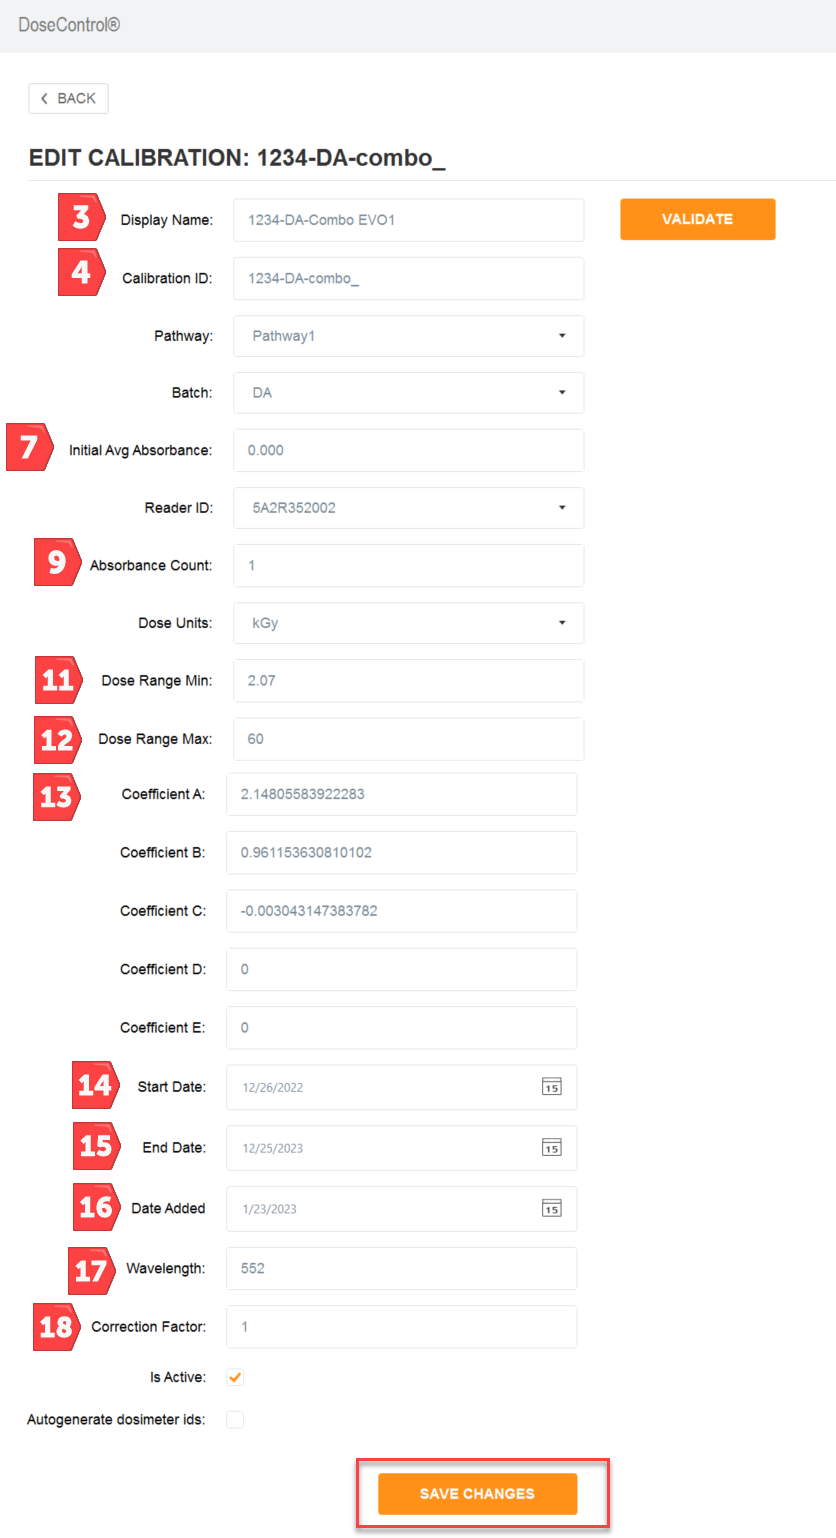
3 Display Name: Enter the name of the calibration to be displayed onscreen and in reports. This may be equivalent to the calibration ID or may be some other identifier that is easy to use. This calibration Display Name must be unique within the system.
4 Calibration ID: Enter a calibration ID number that is generated at the time of curve fitting that uniquely identifies the specific curve being used. This field provides reference to an external calibration report and associates it with certificates and traceability to a specific laboratory. Calibration ID must be unique within the system.
5 Pathway: Select the Pathway associated with the calibration from the drop-down list of active pathways. If you deactivate a Pathway in the pathway configuration, it will deactivate all calibrations associated with it. Therefore, the Pathway must be active before you can create a new calibration using that Pathway.
6 Batch: Select the dosimeter batch ID associated with the calibration from the drop-down list of active batches. If you deactivate a Batch in the batch configuration, it will deactivate all calibrations associated with it. Therefore, the Batch must be active before you can create a new calibration using that batch.
7 Initial Avg. Absorbance: Enter the initial average absorbance for the dosimeter, if any, to be used in the calculation of net absorbance ΔAλ. Enter ‘0’ or leave the field empty for no value.
8 Reader ID: Select the spectrophotometer ID associated with the calibration from the drop-down list of active instruments (readers). If you deactivate a Reader in the reader configuration, it will deactivate all calibrations associated with it. Therefore, the Reader must be active before you can create a new calibration using that reader.
9 Absorbance Count: Enter the number of dosimeter replicates in the dosimeter package or pouch – this number will be specific for your dosimetry process. If a pouch has 1 dosimeter, replicate A, or so forth, enter “1”. If there are 2 dosimeters in a pouch enter “2”. The software will associate that there must be ‘X’ number of dosimeters for each dosimeter ID up to a maximum of 4.
CAUTION
If you are using the statistical rereads method for re-reading dosimeters, the statistical rereads feature will only work if the absorbance count is “1”. For more information, see Setup Rereads - Configuration.
10 Dose Units: Select kGy or Gy. In either case, the resolution of dose is fixed at one significant digit in the software (e.g. 12.5 kGy or 1250.0 Gy). This resolution applies to all dose fields in the software.
11 Dose Range Min: Enter the minimum dose from the calibration so that the software will warn users when the measured dose is below this range. You can find the minimum dose from the calibration certificate provided by the certified calibration laboratory.
12 Dose Range Max: Enter the maximum dose from the calibration so that the software will warn users when the measured dose is above this range. You can find the maximum dose from the calibration certificate provided by the certified calibration laboratory.
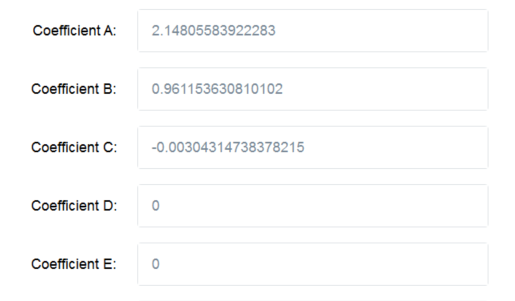
13 Coefficient A through E (0 – 4): Enter each of the calibration coefficients using the full number of significant digits, in the order of a + bx + cx^2 + dx^3 + ex^4. If there is no coefficient value, enter a ‘0’.
Example calibration curve fit coefficients from the lab:

Calibration configuration setup in DoseControl:
14 Start Date: Select the Date on which the calibration will become active. The Application Administrator can set a date in the future when the calibration will become active, if needed. Otherwise, use today’s date.
15 End Date: Select the Date on which the calibration should become inactive. The Application Administrator can set how long a calibration may be used. This date is editable after the fact so that the administrator can extend the use of a calibration, if desired. Changing the End Date is an audited event.
16 Date Added: Autogenerated date when the calibration is added to the software.
17 Wavelength: Enter the wavelength of measurement in nanometers (nm) that is used for the calibration. For B3 dosimeters, this wavelength is 552 (unless otherwise indicated on your calibration certificate provided by the certified calibration laboratory). Enter without any units (e.g. ‘552’).
18 Correction Factor: Enter a linear correction factor to be applied to the measured dose.
Enter a value of “1.0” if there is no correction factor used in your calibration (most typical). A correction factor can be used for a variety of reasons but is not common.
19 Is Active: The calibration must be checked as ‘Active’ to be used in the software. The system will automatically inactivate a calibration if pathways, readers, or batches associated with the calibration are inactivated.
20 Auto generate Dosimeter ID’s: Check this box to have the system automatically generate random Dosimeter ID’s. Use this feature only if you DO NOT want the user to manually enter Dosimeter IDs or if you are not using a barcode scanner to enter Dosimeter IDs. For example, if the user wants to simply read dosimeters in sequence and not add the extra time of manually typing dosimeter ID’s.
IMPORTANT
Currently, the Auto-generate Dosimeter ID feature cannot be changed or edited after using a calibration. It must be determined by the user in advance of using the calibration if the user wants to use it or not.
21 Check the “Is Active” box to activate the new calibration for use.
22 To finish, click “Add Calibration” button.
Import a Calibration
Import feature is only available for GEX calibration files CALDAT.xlsx. For calibrations provided by other calibration laboratories, please manually configure the calibration information directly into the software.
1 On the Calibration Set Up screen, click the “Import New Calibration” button.

2 Browse for the CALDAT.xlsx file.
3 Click the carrot icon to import.

4 Most of the calibration information is directly import into the new calibration setup. To complete the new calibration setup, complete the missing fields (see field descriptions above).
NOTE - The software will round the calibration coefficients to 15 decimal places.
5 Check the “Is Active” box to activate the new calibration for use.
NOTE
You cannot delete a Calibration or edit any fields in the Calibration after it has been used in the software. 21CFR Part 11 compliance.
NOTE
Unlike other screens, calibrations cannot be activated/deactivated with the box on the list screen. The user must open and scroll to the bottom, activate/deactivate, and then select “Save Changes”.