Setup - Readers (Spectrophotometer)
IMPORTANT – BEFORE READER SETUP
Before using DoseControl software, setup and connect the spectrophotometer to the PC workstation.
Refer to the product specification and usage documentation for the spectrophotometer to ensure the correct setup and connection to the DoseControl software.
Thermo GENESYS 30 Product Specification and Usage Document - GEX Doc# 100-167
Thermo Evolution Product Specification and Usage Document - GEX Doc# 100-156
Matrix Scanner?
If you are using the integrated barcode scanner (the Matrix barcode scanner is installed with the dosimeter holder system inside the spectrophotometer):
Setup the barcode scanner before using DoseControl. Refer to the product specification and usage documentation for the scanner. Matrix120 Barcode Scanner Product Specification and Usage Document – GEX Doc# 100-132
The Matrix scanner can be used for 1 dosimeter/pouch ONLY (absorbance count = 1 in Calibration). If you use 2 dosimeter/pouch (absorbance count = 2 in Calibration), you must use a different solution (hand-held scanner or type dosimeter ID).
About Readers (Spectrophotometers)
DoseControl controls the spectrophotometer reader, and ensures the correct reader is connected to the system to ensure data integrity. Each spectrophotometer must be configured within the software and properly connected to work with the software and PC.
Information you will need:
Spectrophotometer instrument serial number
PC name (the machine name of your PC workstation to be used with the dosimetry system)
Connection information
COM port number for the GENESYS 30 or Evolution
Baud rate settings
Spectrophotometer instrument calibration dates
Setup a new Reader (spectrophotometer)
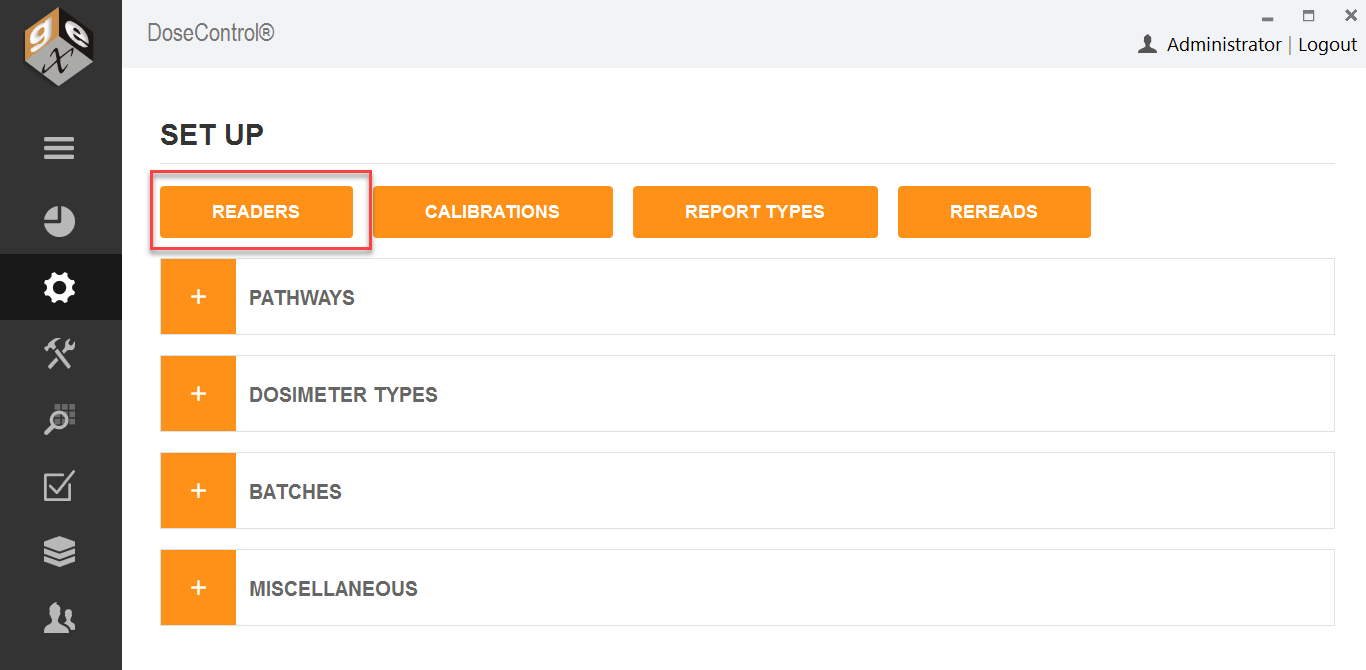
1 Click the “Readers” button from the Setup Menu.
2 Next, click the “Add New Reader” button.
3 Reader ID: Enter name for the spectrophotometer that will be the on-screen and report name for this reader. Examples – “Lab 1 G30 reader” “Dosimetry Lab G30”.
4 Model Info: Select the spectrophotometer model type from the dropdown.
5 Is Active: The instrument status. Check “Is Active” if the instrument will be used in the dosimetry process.
Uncheck the “Is Active” tick box when you want to remove the reader from service, and the software will prevent any user from making measurements with that instrument even if they connect it to a DoseControl PC.
6 Min Reading Value: The minimum absorbance that should be considered a valid measurement.
· Thermo GENESYS 20 specification for min reading value is “0.001”.
· Thermo GENESYS 30 specification for min reading value is “0.001”.
· Thermo Evolution specification for min reading value is “0.001”.
7 Max Reading Value: The minimum absorbance that should be considered a valid measurement.
· Thermo GENESYS 30 specification for max reading value is “2.5”.
· Thermo GENESYS 30 specification for max reading value is “3”.
· Thermo Evolution specification for max reading value is “4”.
NOTE: The software will flag measurements outside the reader’s Min/Max range as invalid measurements. The data is retained but the value is not counted as a “measurement” or a “reread”; the value is flagged as archived in the database.
8 Serial Number: Enter the serial number of the Evolution or GENESYS 30 spectrophotometer as it appears on the equipment tag. The software verifies the instrument’s serial number upon initialization (when the software is first opened), before every zero “0” of the GENESYS 30, and every dosimeter measurement; this S/N verification provides measurement data traceability.
CAUTION: If the reader’s serial number configured in the software does not match the actual serial number of the reader connected to the system, the instrument will not operate.
NOTE: For the older models of Thermo spectrophotometers, the serial number of a GENESYS 20 cannot be electronically verified by the software (GENESYS 20 readers cannot be used as part of an FDA 21 CFR part 11 compliant system). However, you may enter the serial number of the GENESYS 20 in the “Serial Number” field for record keeping purposes.
9 Description: Enter descriptive information about the spectrophotometer. The purpose is to help to the Application Administrator in large organizations identify one reader from another. Example: “located in the lab” or “G30 ABC123 located in Lab 1”.
10 Make (Optional): Enter the reader’s manufacturer name, if desired, “Thermo Scientific”.
11 Client Machine Name: Enter the exact Microsoft Windows PC name. The software will verify that it is connected to this specific PC each time the software is opened; and the software will give an error message and prevent use of the measuring functions if this PC name is configured incorrectly. The Client Machine Name verification provides measurement data traceability.
· Go to your PC settings, device specifications (Windows search 'View your PC Name')
CAUTION: If the PC Name configured in the software does not match the actual PC name of the PC connected to the system, the instrument will not operate.
12 Zero (Optional): Enter a maximum idle time (in minutes) for the spectrophotometer before the system alerts the user to zero “0” the reader.
When the configured time expires, the software will alert the user to zero “0” the instrument. This can happen at inconvenient times. We recommend that you do not use the Zero option. Instead, make the “zero reader” button on visibile on the measurement screen to allow users to zero at will - see Setup - Miscellaneous.
13 COM Port Number: Ensure the spectrophotometer has been installed and connected as per the instructions given in the reader’s product document.
Enter the COM port number of the connected spectrophotometer.
To find the COM port number, on the PC go to “Device Manager” and “Ports (COM and LTP)”. Find the instrument located in the list under “Ports”.
Right-click and select ‘properties’ and ‘advanced’ to display and/or change the port settings.
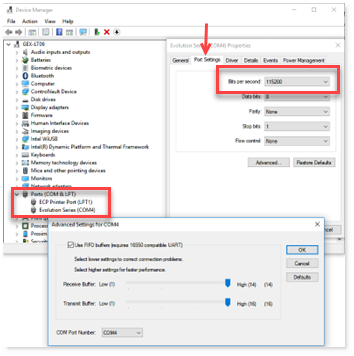
14 Baud Rate (bits per second): Enter the baud rate into this field.
Use a baud rate of 115200 for the GENESYS 30 and Evolution.
For the GENESYS 20 use 9600.
IMPORTANT Ensure the same baud rate entered in this field is the same displayed in the MS Windows’ Device Manger; they must match. Follow the directions above for how to find the port/baud settings on the PC.
15 Requires Barcode Scanner (internal barcode scanners only):
Do not tick this box if you have an external barcode reader. You can use an external barcode reader to scan dosimeter IDs, but you do not need to set up external readers in the Reader configuration.
Tick this box if the reader has an internal barcode reader (Matrix 120 barcode scanner), installed with the GEX holder system inside the reader.
The Scanner S/N (serial number) and Scanner COM Port will automatically populate if the scanner is setup and connected to the PC.
IMPORTANT
For DoseControl software version 1.5.x and higher the previous barcode scanners sold with the system, the Microscan MS-2 and MS-3, are no longer supported in the DoseControl software. Users must upgrade to the Datalogic Matrix 120 barcode scanner to retain barcode scanning functionality.
16 Laser Micrometer (PMMA dosimeters only): Tick this box if reader has an internal laser micrometer installed on the GEX holder system inside the Evolution reader.
Locate the port number for the laser micrometer in the PC’s Device Manager.
Baud rate will be 115200.
17 Last Calibration Date: Enter the Date the spectrophotometer was last calibrated or the date of the last complete performance verification. You do not need to enter a Last Calibration Date if you do not want to use this feature!
18 Next Calibration Date: Enter the Date the spectrophotometer must be calibrated next or the date that a complete performance verification is required. The Application Admin may change this date anytime as needed. You do not need to enter a Next Calibration Date if you do not want to use this feature!
WARNING
The system will prevent measurement activities if the spectrophotometer is not within the specified calibration date timeframe. If the “Next Calibration Date” has expired, the software will show an error message (see example below). You must perform the performance verification for the spectrophotometer and the DoseControl App Admin must change the Reader’s “Next Calibration Date” to a new date in the future.
19 Comment (Optional): Enter a comment regarding the spectrophotometer.