Enterprise - Upgrade to a New Version of DoseControl Software -
This article provides instructions for Enterprise license users to upgrade DoseControl software version on a PC. An Enterprise license has DoseControl integrated with another system, and typically will have a SQL Server\Instance on a LAN (local area network) or cloud. See the caution to Premier/Enterprise users below.
If you have an Premier license (DoseControl is integrated with another system) or a Basic license (SQL Server\Instance, database located on the same PC as DoseControl), go to the appropriate upgrade instructions for your license:
Caution for Enterprise/Premier users
CONTACT IT/TECHNICAL SUPPORT
Contact your IT/Technical Support team for assistance when upgrading DoseControl.
BACKUP THE DATABASE
Contact your IT/Technical Support team to backup your SQL Server database instance of DoseControl application.
WARNING!
If you have a Enterprise/Premier license and have multiple PCs connected to a shared database - DO NOT INSTALL THE UPGRADE VERSION ON ANY OF THE PCs until you have fully uninstalled the DoseControl software (follow instructions below).
You must also delete or rename the settings.json file located in C:\ProgramData\GEX on each PC. If you do not delete the settings.json file on each PC, the software will automatically connect to the database on the network when the upgraded version is install on one PC. This connection will overwrite the database with the new database schema.
About DoseControl software version upgrades
See Common Questions.
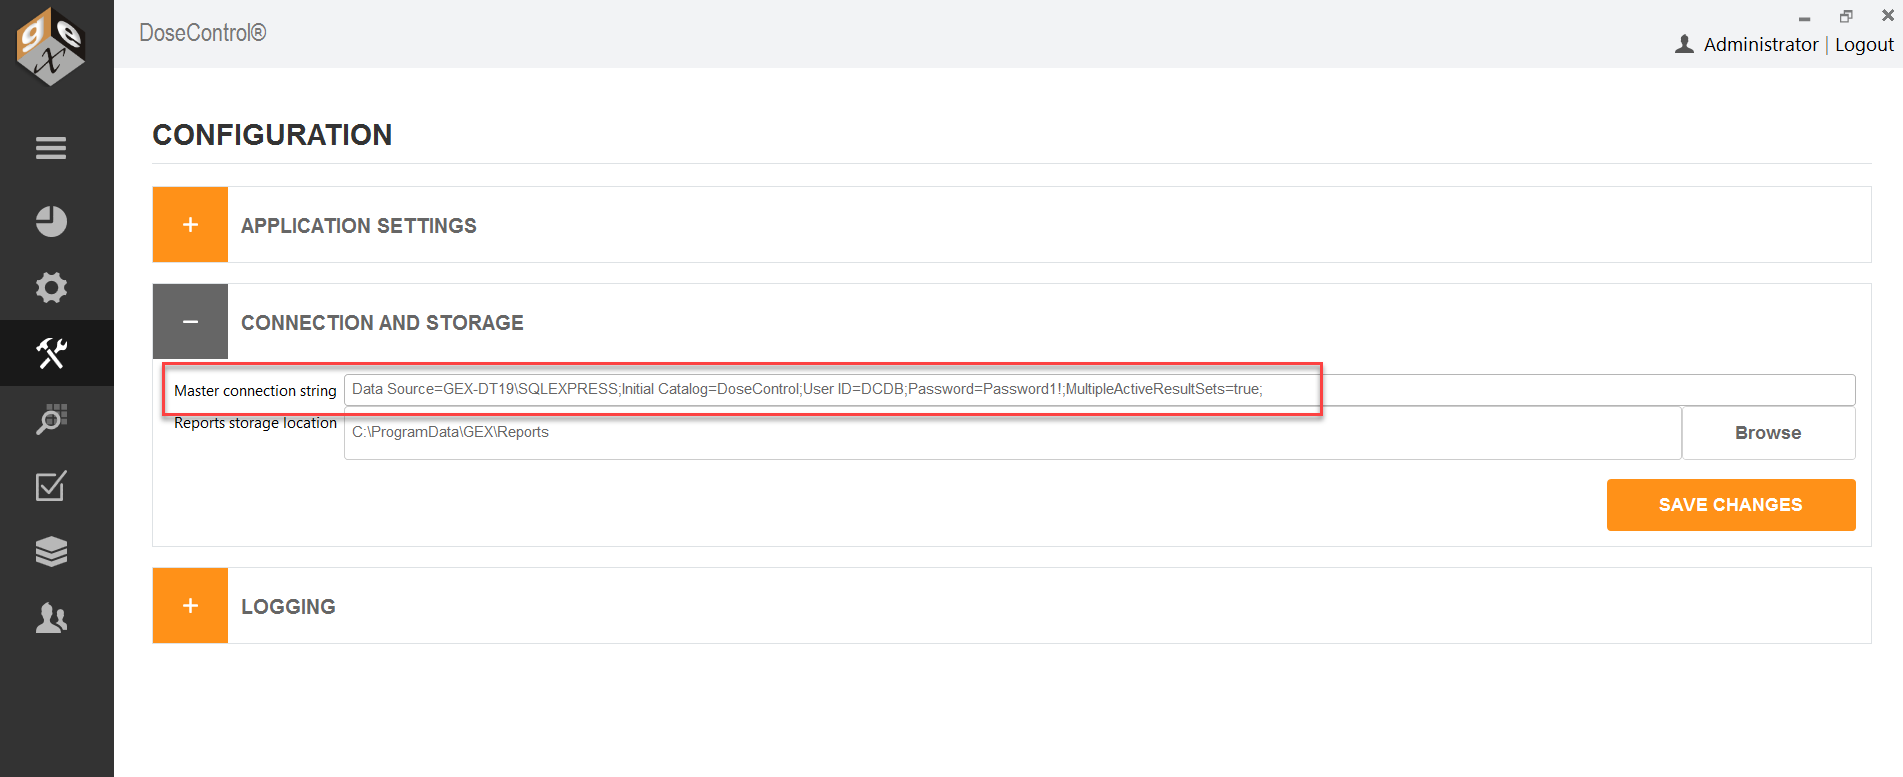
CONNECTION STRING
Keep a copy of the DoseControl connection string. The connection string is the SQL connection string to connect DoseControl to the application database.
When the upgrade is complete on all PC’s you will need to re-enter the connection string in Connections and Storage.
DOSECONTROL “MODULES”
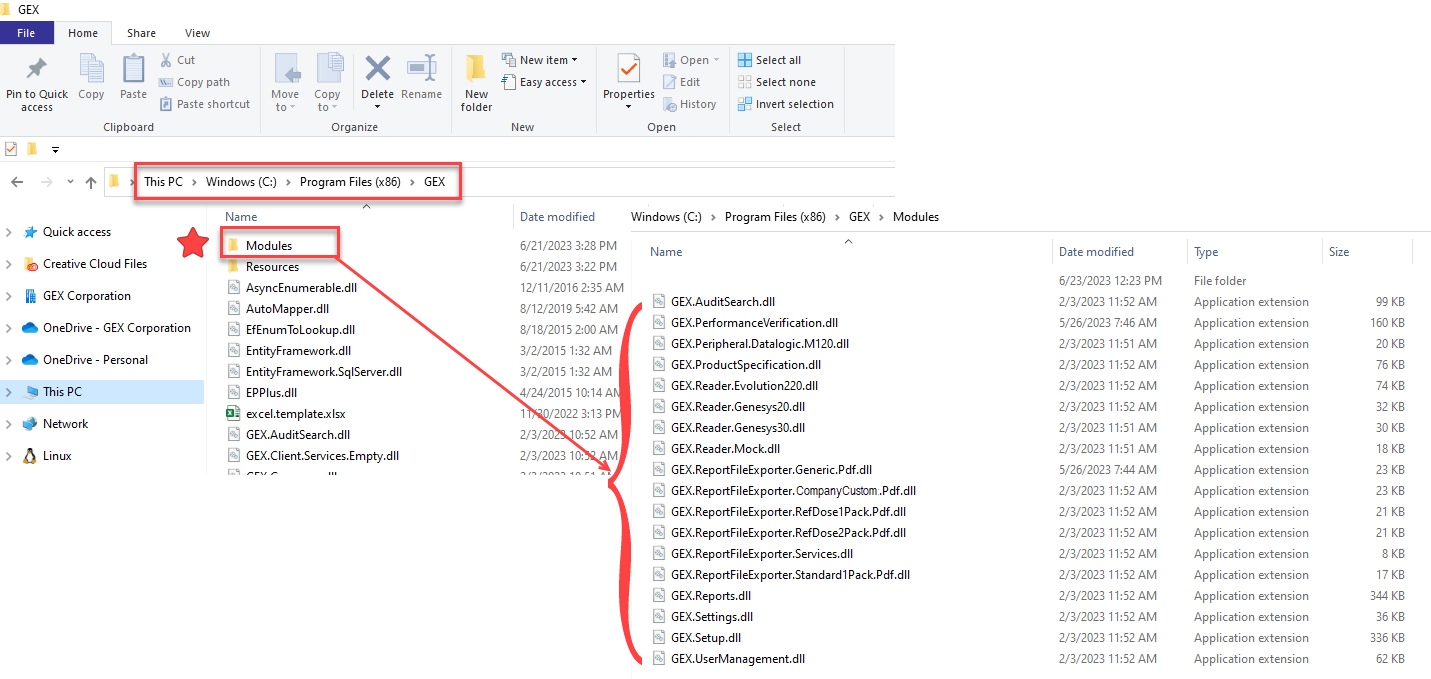
Remember the Program Files(x86)\GEX\Modules must include all the module files from the previous installation at a minimum. The modules file type is *.dll.
Compare the screenshot of your previous install Modules folder to the new Modules folder. Your new installation must have all the same module files as your old version, plus any new modules included with the version – you cannot have any missing module files, or the upgrade will not complete.
Upgrade preparation
1 Take a screenshot of the list of module files for your current installation. Save screenshot image to desktop. Go to C:\Program Files (x86)\GEX\Modules. Your modules are the *.dll files located in Modules folder.
2 Open GEX DoseControl software. Take a screenshot of your connection string and save image to desktop. Copy the text of your connection string and save as a .txt file or Word file.
3 Take screenshots of any configuration settings (Readers, Calibrations, etc.). Or, keep a record of your DoseControl configuration information.
4 Make a backup of your database. Always keep a current backup of your database in the event of a problem during upgrading the software.
Contact your IT/Technical Support to backup your SQL Server database instance of DoseControl application.
SSMS Instructions: Open SSMS (SQL Server Management Studio) and login. In the Object Explorer, open Databases. Right click on your database instance, go to Tasks > Backup. Create a *.bak file of your existing database. For complete details see Backup MS SQL Server Express database instructions.
Upgrade Instructions:
5 Download new version of DoseControl software.
Download the new version install folder sent from GEX. This link was given to you by GEX.
Unzip the downloaded folder.
Save/place install folder onto your desktop.
Check for security blocks on the files. Right-click → General tab → check “unblock” if needed.
6 Uninstall old version of GEX/DoseControl application.
Uninstall GEX/DoseControl application from each PC workstation you wish to upgrade (use the “Add/Remove programs” via Windows system settings).
Delete the GEX Program folder (found in C:\Program Files (x86)\GEX).
7 Install new version of GEX/DoseControl application
Double click the .msi installer in the new version folder. Follow prompts to install the new version of DoseControl on your PC. Install will take less than 1 minute.
8 Place the modules for the new version of GEX/DoseControl into Program Files(x86)\GEX\Modules.
Copy all the *.dll files (module files) that are included in the install folder. These modules are specific to your software installation – there may be new, additional modules added for your upgrade.
Go to Program Files(x86)\GEX\Modules and paste the copied Modules into the Modules folder.
9 On your desktop you will see the GEX/DoseControl application icon. Double click to open.
10 Enter the Connection String when prompted.
11 Enter your Global Admin username and password when prompted.
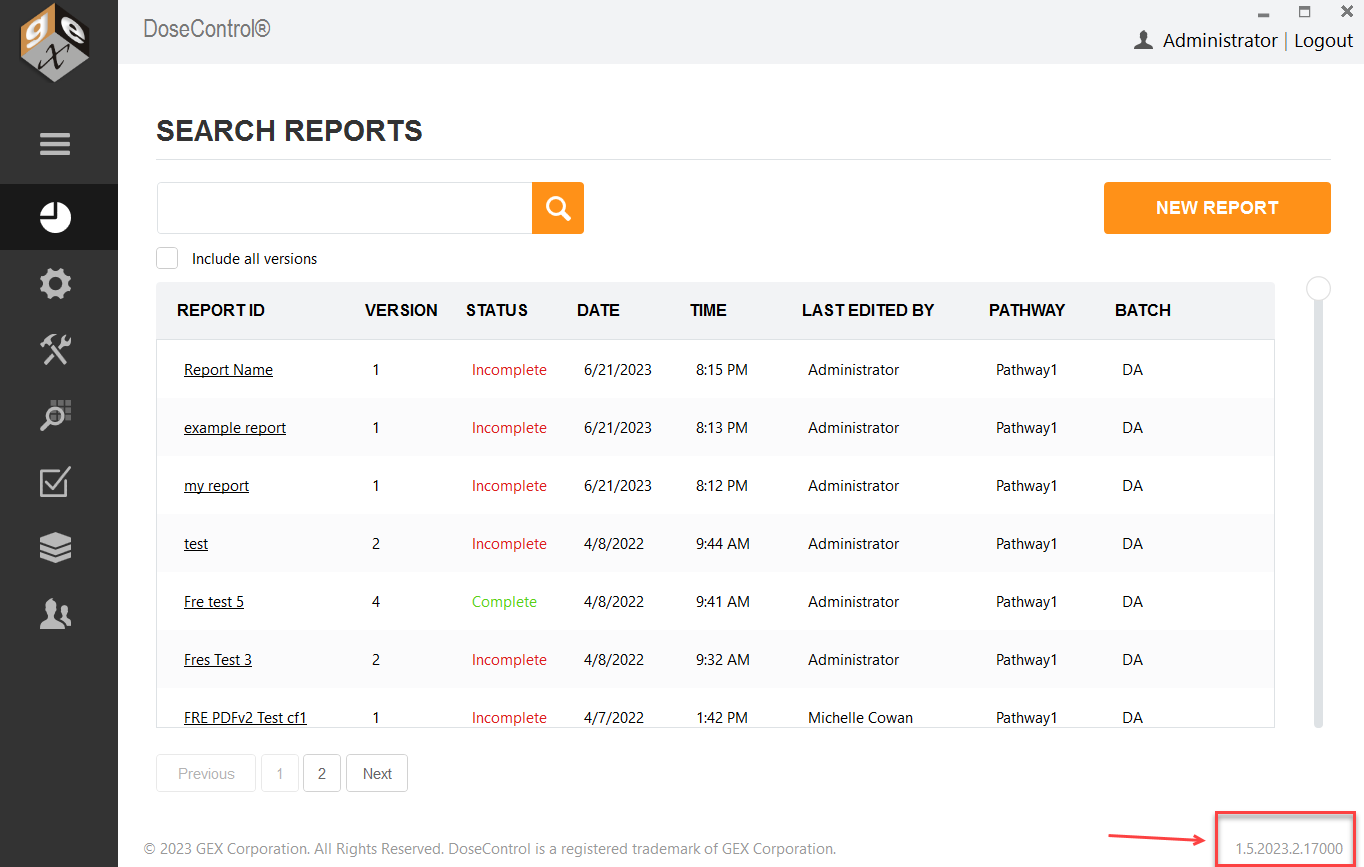
12 The upgrade process is almost complete. You should see the Reports home screen of the GEX/DoseControl software with the new version ID (version number is in the lower righthand corner of the screen). The home screen should list your existing dosimetry reports.
Your original DoseControl configuration settings should be intact. Go to the Setup icon (sprocket icon) and check that your original configuration set up is correct.
13 Fix Report Types. If you are upgrading from an older version of DoseControl (v1.x) to DoseControl v2.0, you must open each Report Type and click the “Save Options” button in report output options. This is a known issue, but takes just a few minutes! See instructions Report Types fix for v2.0.
14 Upgrade is complete. Repeat this process for each PC.